Showing posts with label dessert. Show all posts

Tuesday, January 24, 2012

Gooey Butter Cookies


I made these cookies for Christmas and they were absolutely divine.  They were a bit sweet as well as a bit savory and light and fluffy (so you can eat 25 before feeling ill- I know this from experience).


Gooey Butter Cookies (recipe by Mathew Rice of Nightwood Restaurant)
  • 4 1/2 cups all purpose flour
  • 4 teaspoons baking powder
  • 1 1/2 teaspoons salt
  • 1 pound cream cheese
  • 2 sticks unsalted butter
  • 1/2 vanilla bean, scraped (optional (Tim thinks it is optional, but important))
  • 3 cups sugar
  • 2 eggs
  • 1 teaspoon vanilla extract
  • Confectioner’s sugar for rolling and dusting
Stir together the flour, baking powder, and salt.  Set aside.  In the bowl of an electric mixer with the paddle attachment, cream the cream cheese, butter, vanilla bean seeds, and sugar together until fluffy.  Add the eggs and vanilla extract.
Incorporate the flour mixture.  Chill for at least 30 minutes.  Scoop roughly 1-ounce balls and toss in the confectioner’s sugar.  Place on a baking sheet, lined with parchment, a couple of inches apart.  Bake at 325° F until they spread and puff slightly, about 12-16 minutes.  They will be really soft in the center.  If they start to brown, they’ve gone too far.  Cool to room temperature.
The recipe recommended refrigerating them from here and I was skeptical but decided to try it and they were even better cold!  Try them both ways and see which you prefer.

Monday, October 31, 2011

Salted Chocolate Shortbread Cookies


I have less than 4 weeks left until my due date and my sweet cravings are in full effect.  I'm definitely starting to get a bit uncomfortable and sugar cures everything, right?  I've always loved traditional shortbread cookies so I decided to try making a chocolate version and they were glorious.  The mixture of salty and sweet was perfectly balanced and my only complaint was that I couldn't stop eating them.  


1¼ cups all-purpose flour
1/3 cup unsweetened cocoa powder
½ teaspoon baking soda
1 stick plus 3 tablespoons (11 tablespoons) unsalted butter, at room temperature
2/3 cup light brown sugar
¼ granulated sugar
½ teaspoon fleur de sel or ¼ teaspoon fine sea salt, plus extra for sprinkling
1 teaspoon vanilla extract
1. Whisk together the flour, cocoa and baking soda in a small bowl; set aside.
2. Beat the butter on medium speed until soft and creamy. Add both sugars, the salt and vanilla extract and beat for 2 minutes more.
3. With the mixer off, add the dry ingredients. Turn the mixer on and off low speed (pulse) for a second or two about 5 times so that the flour mixture gets incorporated. Then mix on low speed for about 30 seconds, just until the flour disappears into the dough (the dough will look crumbly).
4. Turn the dough out onto a work surface and divide it in two. Shape each half into a 9-inch log. Wrap the logs in plastic wrap and refrigerate for at least 3 hours. (The dough can be refrigerated up to 3 days or frozen for up to 2 months. If you’ve frozen the dough, you don’t need to defrost before baking – just slice the logs into cookies and baking the cookies 1 minute longer.)
5. Center a rack in the oven and preheat the oven to 325 degrees F. Line two baking sheets with parchment or silicone mats.
6. Using a sharp thin knife, slice the logs into rounds that are ½-inch thick. Arrange the rounds on the baking sheets, leaving about 1 inch between them. Sprinkle a small amount of extra salt on top of each round.
7. Bake the cookies one sheet at a time for 12 minutes – they won’t look done, and won’t be firm, but that’s how they should be. Transfer the baking sheet to a cooling rack and let the cookies rest until they are only just warm, at which point you can serve them or let them reach room temperature. Store the cookies in an airtight container at room temperature.

Monday, October 10, 2011

Smores Cookies


These smores cookies are the perfect example of a creative twist on an old favorite (my last smores dessert can be found here).  I made them over the weekend to take to a friend's house and they were a huge hit.  They were rich, sweet, and gooey (all things I look for in a dessert).  I'm already looking for an excuse to make them again.  

Smores Cookies (adapted from Cookie Madness)

1 3/4 cups flour
1 cup graham cracker crumbs
1 tsp. baking soda
1 tsp. salt
1 cup/ 2 sticks unsalted butter, room temperature
3/4 cup sugar
3/4 cup light brown sugar
2 tsp. vanilla
2 eggs
2 cups miniature chocolate chips
1 1/2 cups mini marshmallows
3 regular Hershey bars, roughly chopped

In a stand mixer, combine the butter and sugars and mix until fluffy. Mix in the eggs and vanilla until combined. Add the flour, graham crackers, salt and baking soda and mix well. Stir in the chocolate chips then cover and refrigerate the dough for about one hour. 
Preheat oven to 375 F. Take a tablespoon of the dough, roll into a ball, and drop onto a greased baking sheet. Repeat with the rest of dough, leaving about 2 inches between each to allow it to spread. Bake for 6 minutes, then remove from the oven. Push a 3 - 5 marshmallows and a few pieces of a Hershey's bar into each cookie. Return to oven and bake for another 2 - 3 minutes until golden brown and the marshmallows are a bit toasted. Cool on a wire rack and enjoy!

Monday, April 25, 2011

Red Velvet Cheesecake


I baked it in a water bath to avoid cracks.


I was trying to find something an interesting dessert to make for Easter and came across this Red Velvet Cheesecake that I couldn't turn down.  As a huge fan of both red velvet and cheesecake (seen here and here), combining the two was genius.  It was the perfect end to our Easter meal.

Monday, April 11, 2011

Strawberry Shortcake Cookies


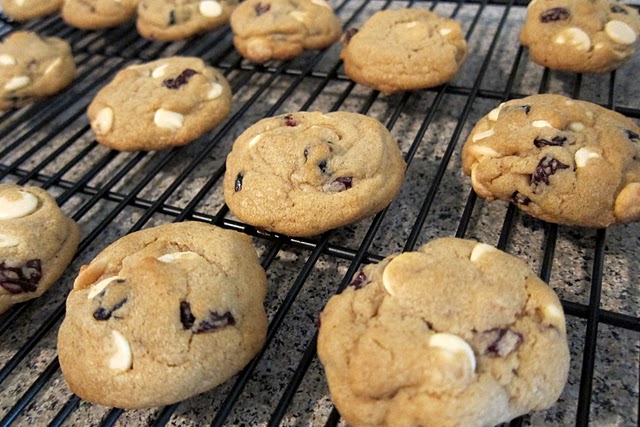
Strawberry shortcake is one of my all time favorite desserts, but until this weekend I had never heard of it coming in the form of a cookie.  Once I came across this recipe, I had to make them right away.  I used a mixture of dried strawberries, cherries, and blueberries because that's what I had so technically mine could be called "Berry Shortcake Cookies".  They were chewy, fluffy, sweet, and a little salty.  They were excellent.

Wednesday, March 16, 2011

Homemade Milano Cookies


As I mentioned yesterday, I did some baking over the weekend and made these homemade Milano cookies.  I've always loved the Pepperidge Farm version and the wasn't sure if they could be topped.  I was wrong.  These homemade cookies blew the store bought variety out of the water.  They were buttery, slightly sweet but also a bit salty, flaky and crumbly with soft centers and gooey vanilla flavored chocolate oozing out the middle.  They were really something special, if I do say so myself.  Gabe also approved.

Homemade Milano Cookies
Ingredients (for shortbread cookies):
2 sticks butter, softened
1/2 cup granulated sugar
1/4 tsp salt
1 3/4 cups all purpose flour
2 tsp vanilla extract
Directions:
-Preheat oven to 350
-Cream together butter and sugar with an electric mixer.  Add flour, salt, and vanilla and blend until it forms a soft dough.
-Wrap dough in plastic wrap and store in refrigerator for 30 minutes.
-Roll dough into a log and cut 1/4-1/2 inch slices.  Place slices on cookie sheet and bake for 10-15 minutes or until edges start to turn brown.  Cool completely on a rack.
Chocolate center:
1 cup milk chocolate chips
1/4 tsp vanilla extract (can substitute for mint, almond, etc.)
-Melt chocolate in microwave safe bowl, stirring every 30 seconds (should take about 60-90 seconds total). Stir in vanilla extract and spread melted chocolate on half the cookies, topping them with the other half to create a sandwich.

Thursday, March 3, 2011

Salted Caramel Brownie Cookies


You really can't go wrong with anything that involves salt and caramel, in my opinion.  The combination perfectly satisfies all sweet and salty cravings simultaneously and always leaves me wanting more.  I made these Salted Caramel Brownie Cookies over the weekend and although they didn't rise as they should have (anyone know why?), the taste was spectacular.  They were the perfect amount of sweet and salty, chewy on the inside and crispy on the outside, and are definitely one of my new favorite cookies.  

Tuesday, February 15, 2011

Red Velvet Whoopie Pies


 Gabe loved them!
As many of you already know, one of my favorite aspects of any holiday is the food (namely, desserts).  For Valentine's Day I felt the need to bake something and these Red Velvet Whoopie Pies seemed perfectly appropriate.  This was actually my first attempt with Whoopie Pies and they were remarkable.  I'm pretty sure they'll blow your mind.

Red Velvet Whoopie Pies (adapted from Better Homes and Gardens)
Ingredients
  • 2  cups  all-purpose flour
  • 2  Tbsp.  unsweetened cocoa powder
  • 1/2  tsp.  baking soda
  • 1/4  tsp.  salt
  • 1/2  cup  butter, softened
  • 1  cup  packed brown sugar
  • 1    egg
  • 1  tsp.  vanilla
  • 1/2  cup  buttermilk
  • 1  1-oz. bottle  red food coloring (2 Tbsp.)
  • 1  recipe  cream cheese frosting (recipe here)

directions

1. Preheat oven to 375 degrees F. Line baking sheets with parchment; set aside. In medium bowl combine flour, cocoa powder, baking soda, and salt; set aside.
2. In large mixing bowl beat butter on medium to high 30 seconds. Beat in brown sugar until light and fluffy. Beat in egg and vanilla. Alternately add flour mixture and buttermilk, beating after each addition just until combined. Stir in food coloring.
3. Spoon batter in 1- or 2-inch diameter rounds, about 1/2-inch high on prepared baking sheets, allowing 1 inch between each round.
4. Bake 7 to 9 minutes for 1-inch cookies or 9 to 11 minutes for 2-inch cookies, or until tops are set. Cool completely on baking sheets on rack. Remove cooled cookies from baking sheets.
5. To fill, dollop Whoopie Pie Filling on flat sides of half the cookies. Top with remaining cookies, flat sides down. Makes 60 one-inch or 42 two-inch cookies.